What is Pi-hole?
Pi-hole is a Linux network-level advertisement and Internet tracker blocking application that acts as a DNS sinkhole and optionally a DHCP server, designed for use on private networks. Pi-hole has the ability to block traditional website advertisements as well as advertisements in unconventional places, such as smart TVs and mobile operating system advertisements.
This post explains how I set up my home network to use Pi-hole for comprehensive ad blocking. The total setup time is less than 30 minutes, thanks to modern tools like the Raspberry Pi Imager.
Pi-hole provides network-level ad blocking for all devices on your network
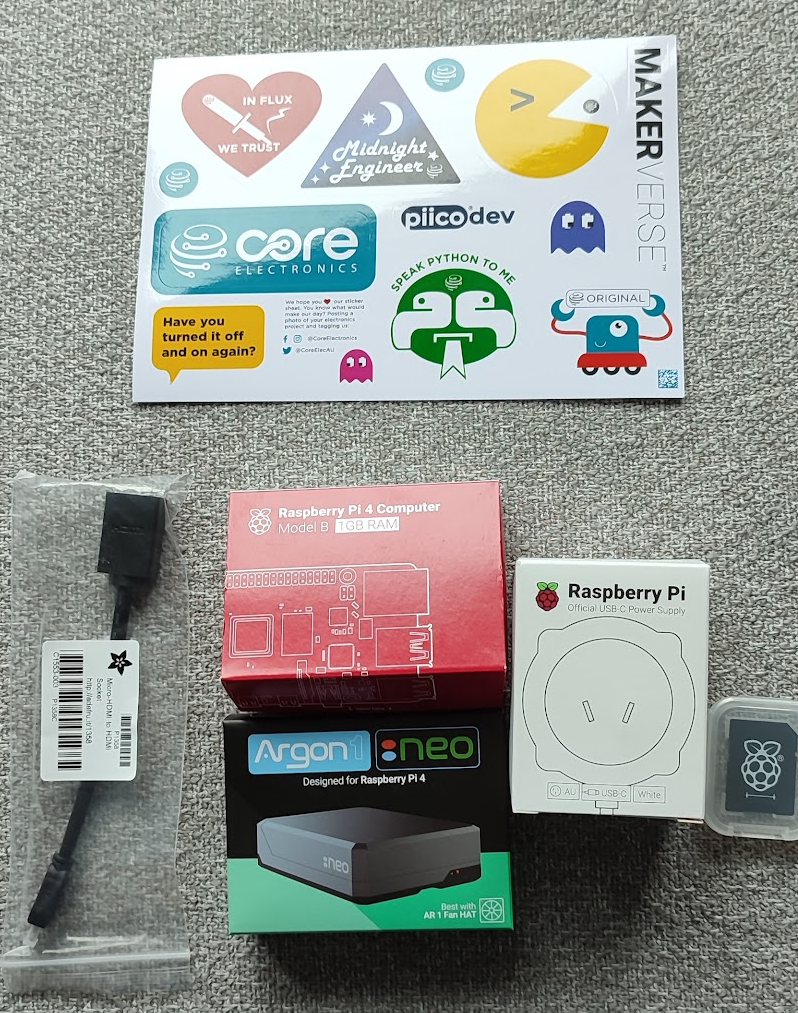
Hardware Requirements
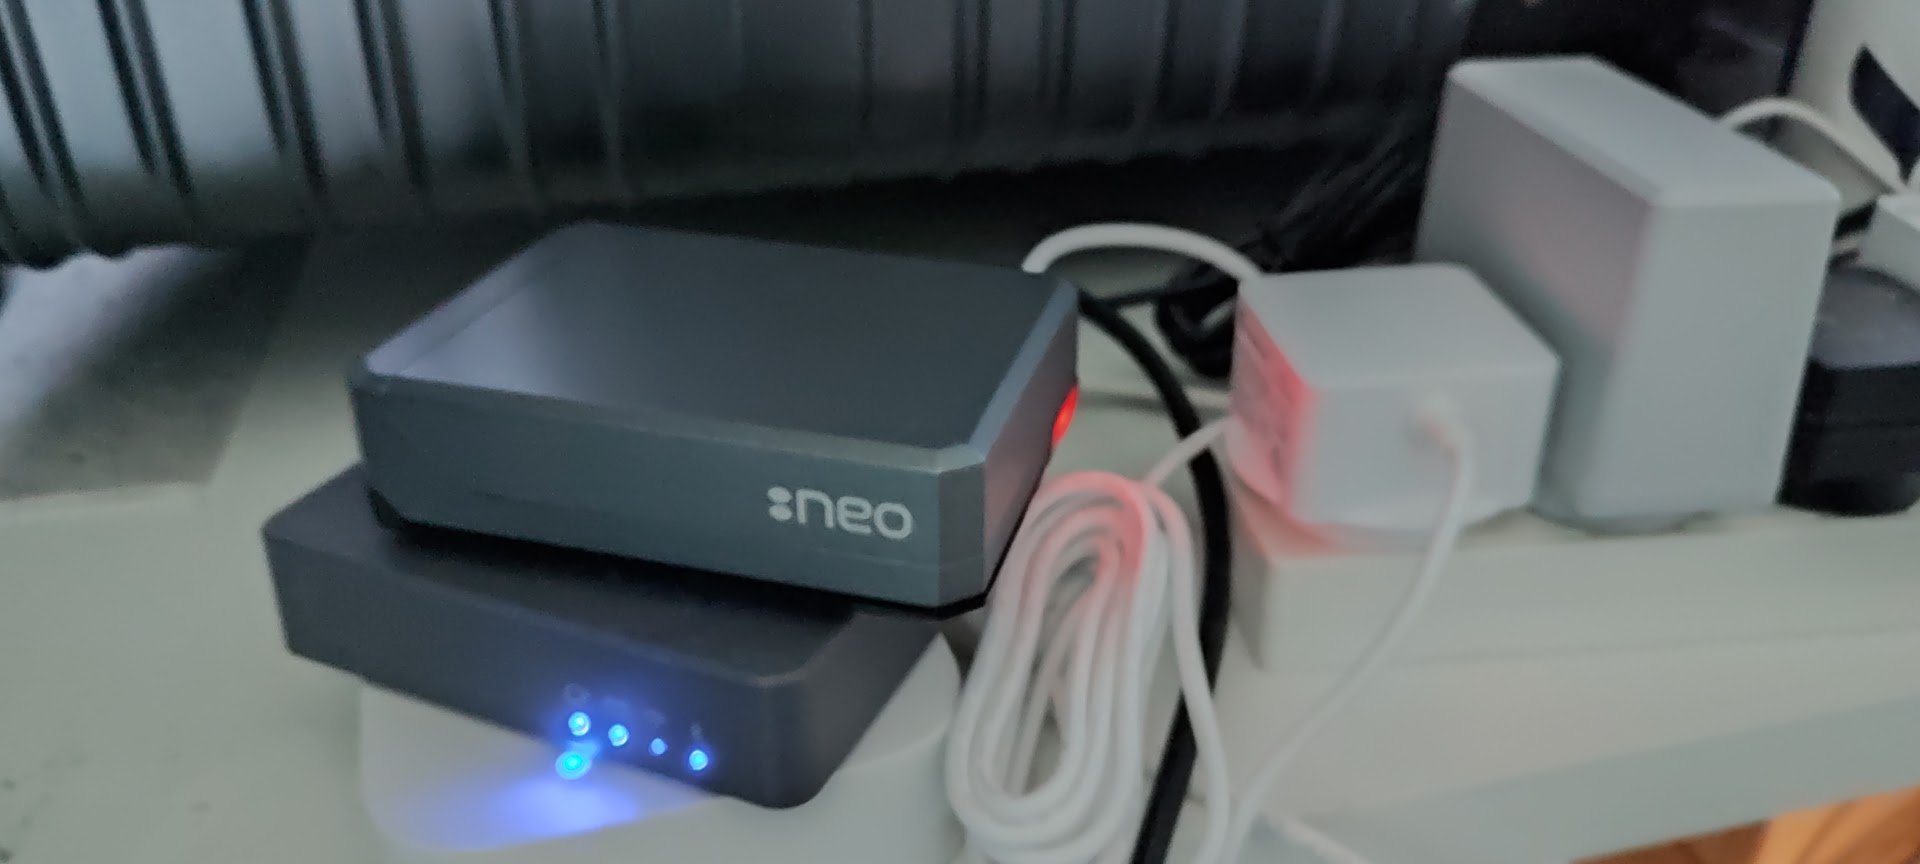
I purchased all components from Core Electronics, which provided excellent service and fast delivery times.
Essential Components
- Raspberry Pi 4 Model B 1GB - The main computing unit
- MicroSD card - Storage for the operating system
- Raspberry Pi 4 Power Supply - Reliable power source
Optional Additions
- Argon NEO Raspberry Pi 4 Case - For better cooling and aesthetics
- Micro-HDMI to HDMI Socket Adapter Cable - For initial setup (not used in final configuration)
Step-by-Step Setup Process
Step 1: Operating System Installation
The SD card I purchased came with NOOBS, but I flashed it with Raspbian using the Raspberry Pi Imager, which makes this process much simpler.
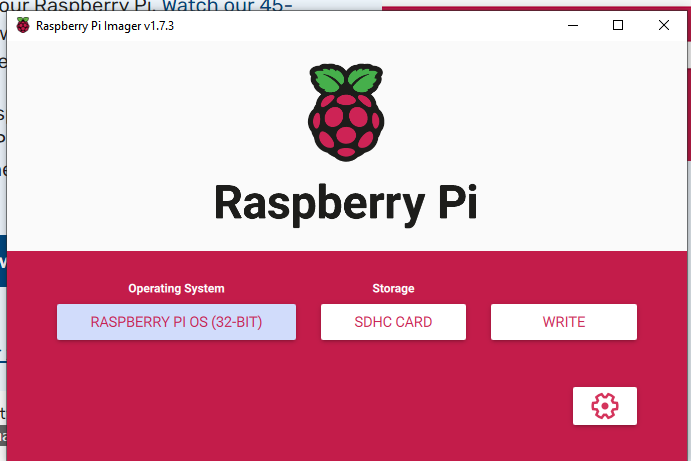
Raspberry Pi Imager simplifies the OS installation process
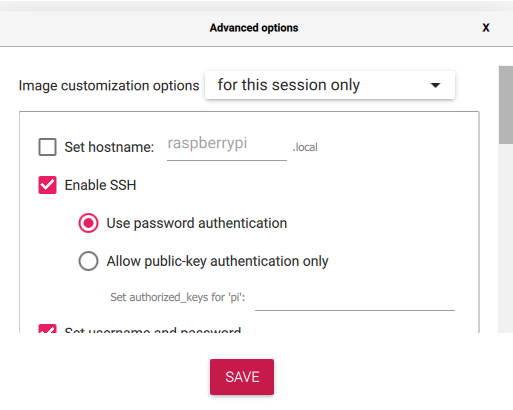
Important: Configure the advanced options during installation:
- Enable SSH - Allows remote access
- Set username and password - Security credentials
- Configure wireless LAN - Network connectivity
- Set locale settings - Regional preferences
This configuration is crucial because it allows you to SSH into your Raspberry Pi instead of needing a monitor and keyboard for initial setup.
Step 2: Network Discovery
After the Raspberry Pi boots up, you can connect to it via SSH. To find the device’s IP address initially, you have several options:
- Use
arp -acommand on your computer - Use a network scanner app - The Network Scanner app on Google Play Store is effective
- Look for “Raspberry Pi” in the device list
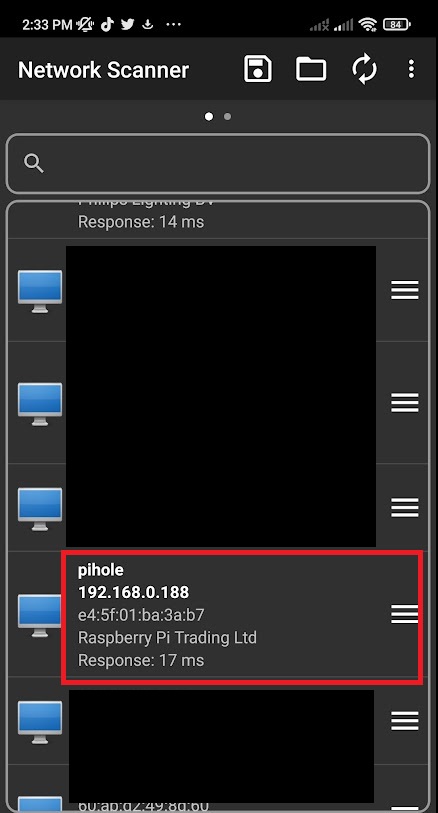
Alternative: If you can’t find the IP address, you can use the hostname pi.hole to connect directly.
Step 3: SSH Connection Setup
Using PuTTY (or any SSH client), connect to your Raspberry Pi using either the IP address or hostname.
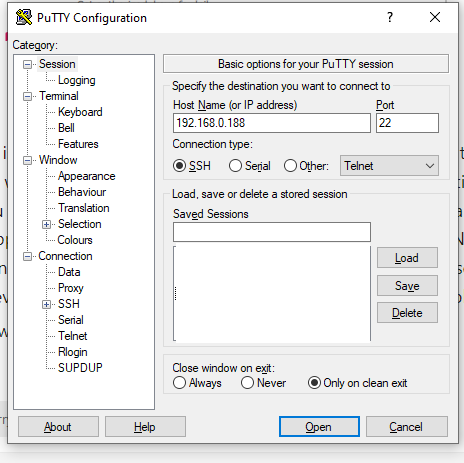

After successful login, you should see the Raspberry Pi command prompt:

Step 4: Pi-hole Installation
The Pi-hole installation process is automated and straightforward. Follow the instructions at the official Pi-hole GitHub repository.
Potential Challenge: You may be asked to set up a static IP address during installation. If needed, follow the instructions at MakeUseOf’s guide.
Step 5: Network Configuration
After Pi-hole installation, you need to configure your devices to use Pi-hole as their DNS server. You have two options:
- Router-level configuration - Affects all devices on the network
- Device-level configuration - Individual device settings
I chose device-level configuration to respect my housemates’ privacy preferences.
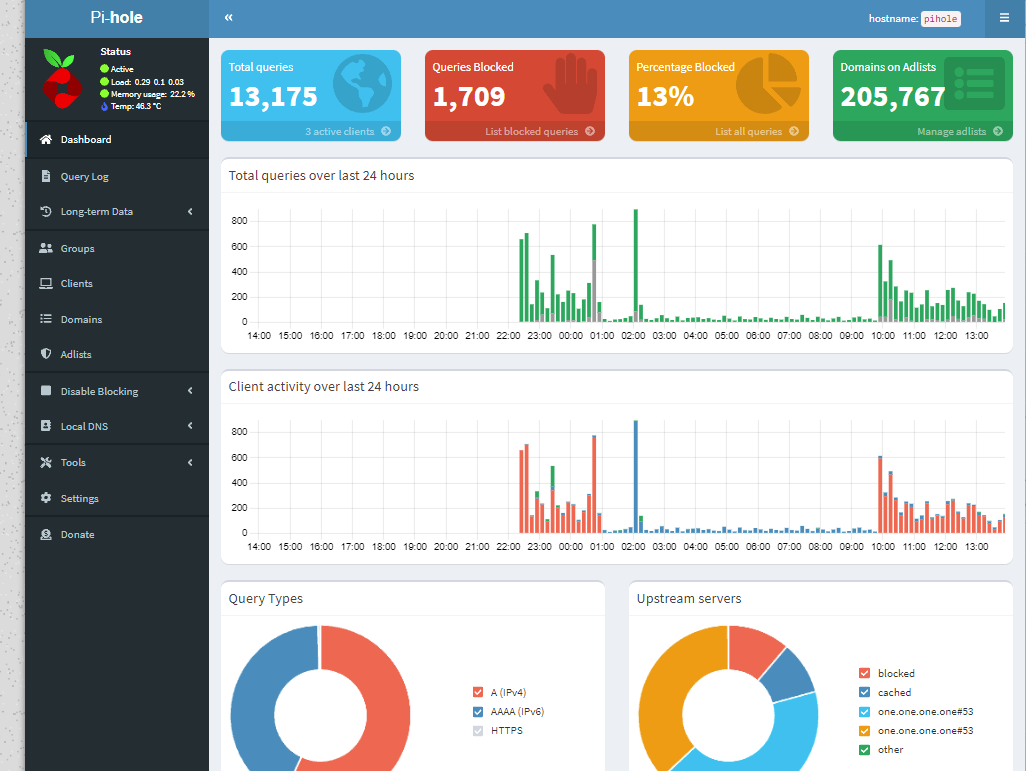
Step 6: Verification and Monitoring
Once configured, Pi-hole will start blocking ads immediately. You can monitor its operation through the web interface.
Enhanced Blocking Lists
To improve ad blocking effectiveness, I added additional blocklists:
YouTube Ad Blocking
https://raw.githubusercontent.com/kboghdady/youTube_ads_4_pi-hole/master/youtubelist.txtEnhanced Tracking Protection
https://blocklistproject.github.io/Lists/tracking.txtImportant: After adding new blocklists, go to Tools → Update Gravity to refresh the lists and apply the changes.
Technical Benefits
Network-Level Blocking
- All devices benefit - No need to configure each device individually
- Smart TV protection - Blocks ads on devices that don’t support browser extensions
- Mobile device coverage - Protects phones and tablets from app-based ads
Performance Improvements
- Faster browsing - Eliminates ad loading delays
- Reduced bandwidth usage - Blocks unnecessary ad requests
- Improved privacy - Prevents tracking requests from reaching their destinations
Best Practices
1. Regular Maintenance
- Update Pi-hole regularly for security patches
- Refresh blocklists weekly for optimal coverage
- Monitor the dashboard for unusual activity
2. Network Considerations
- Ensure Pi-hole has a static IP address
- Consider backup DNS servers for redundancy
- Monitor network performance impact
3. Privacy and Ethics
- Be transparent with network users about ad blocking
- Consider whitelisting legitimate sites if needed
- Respect user preferences for privacy
Troubleshooting
Common Issues
- Devices can’t connect to internet - Check DNS settings
- Some ads still appear - Update blocklists and check for bypass methods
- Slow network performance - Monitor Pi-hole logs for excessive queries
Useful Commands
# Check Pi-hole statuspihole status
# Update blocklistspihole -g
# View query logpihole -t
Conclusion
Setting up Pi-hole has become significantly easier with modern tools like the Raspberry Pi Imager. The entire process takes less than 30 minutes, and the benefits are immediate and comprehensive.
Key Advantages
- Network-wide protection - All devices benefit automatically
- Low resource usage - Raspberry Pi handles the load efficiently
- Customizable blocking - Add or remove blocklists as needed
- Privacy enhancement - Blocks tracking requests at the network level
Complementary Tools
While Pi-hole provides excellent network-level protection, consider also using browser extensions for additional ad blocking capabilities, especially for sites that use sophisticated ad delivery methods.
Pi-hole transforms your Raspberry Pi into a powerful network guardian, providing comprehensive ad blocking and privacy protection for your entire home network.